CLICK HERE FOR FREE BLOGGER TEMPLATES, LINK BUTTONS AND MORE! »

Search This Blog

Sunday, December 26, 2010

Who Dat & two inital monogram tumbler

I pray that each of you had a wonderful Holiday. This year my family hosted Christmas dinner, our home was full of family, laughter, and love... For the first time in over 50 years the RDU area of North Carolina had a white Christmas; therefore our guests left a little earlier then expected:-(  Overall, we had an awesome day and I cannot wait until our next family gathering.
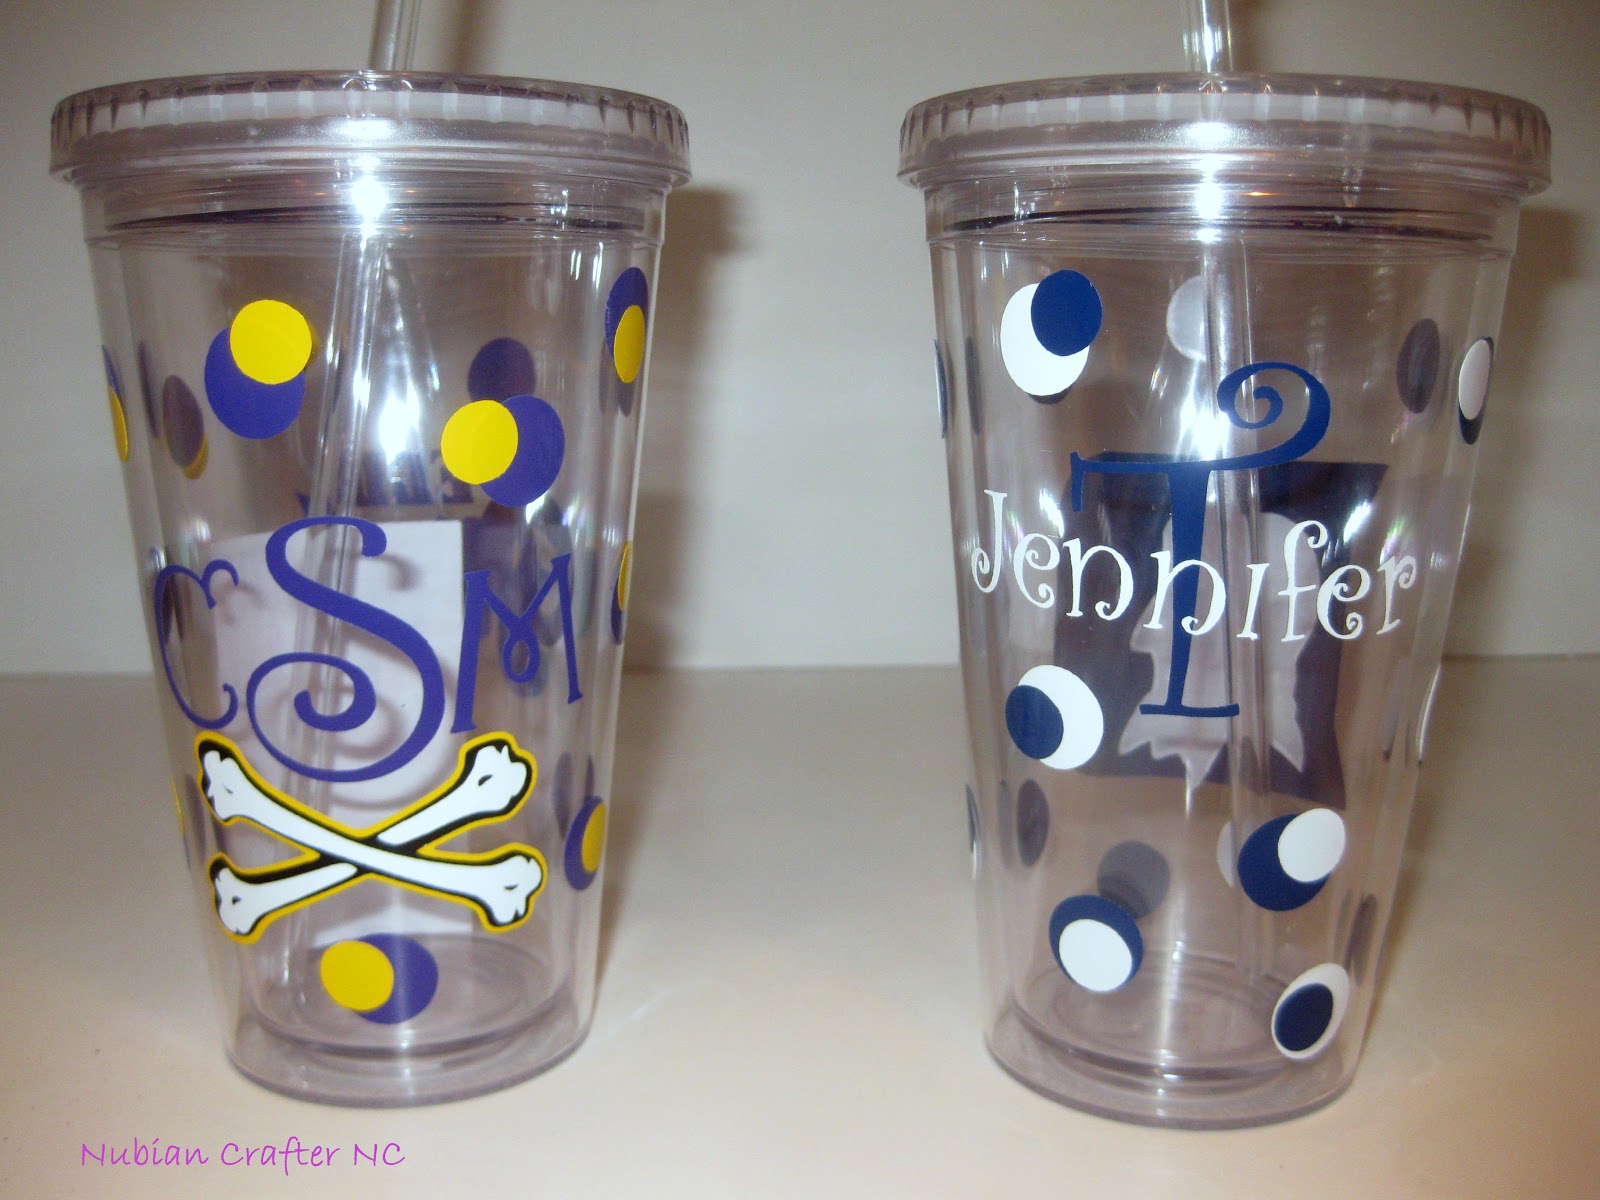
Now, on to our regular scheduled post, I have a couple more tumblers to share... The first tumbler was created for my sista Tsrel over on the Cricut MB... Every year, we exchange Christmas gifts... what better gift then a personalized who dat tumbler and ornament!


The second tumbler was created for an elderly lady that my cousin sits with during the week... According to my cousin, Ms. Finn " drinks out of the same cup everyday" so hopefully she will give this one a try...
I used the font Monotype Corsiva for the monogram, a svg for the scallop and butterflies that I pixel traced into MTC.


Tuesday, December 21, 2010

Hot Chocolate Cones...yummy

Can I say how awesome and cute these little cones are... well I said it anyway:-)
I "lifted" this idea directly from Heart in the Details blog; if you've never stopped by this blog please check it out, Andrea has some great projects and recipes to share...
Anywho, this year our family will be hosting Christmas dinner... I needed a quick and easy gift to give to our 35 guests so when I saw these on Andrea's blog I didn't need to look any further.  These were so easy to create we made it into a family project...

For this project you will need:
12 oz Wilton decorating bags
1 oz Hot Chocolate packets
mini marshmallows
mini chocolate chips ( we used choc, white, and peanut butter)
crushed peppermints (or not)
small rubber bands
ribbon and gift tags
Head on over to Andreas blog for step-by step details

I created my tag in MTC using the print and cut method... One side is a personal message and the other includes instructions...
Click on pic to enlarge

Monday, December 20, 2010

My First Floating Frame!!!

After many months of saying that I wanted to create a floating frame, I've finally finished one!!! I'm a serious procrastinator, I'll see an idea, RUN out and purchase supplies and then let them sit for weeks sometimes months untouched...
So, when my cousin needed a Christmas gift for her ex-MIL I figured this would be the perfect occasion to use one of the floating frames that I snagged from AC Moore... This frame is 11x14; I used oracal vinyl with the Shishoni Brush and Aquarelle font.

The tissue paper is here for photo purposes only...

Sunday, December 12, 2010

University Acrylic Tumblers & Cake...

I'm hooked on decorating these acrylic tumblers (they are sooo addictive)...
Anywho, as one of the holiday gifts for the kids teachers we personalized a tumbler with the teachers name or monogram and favorite University!!!
I found the college logos on sportslogos.net and used  MTC and Oracal 651 vinyl to complete the look.


Why, stop there... while browsing around Michaels, I picked up these super cute ceramic loaf pans...
My grandmother has the most amazing lemon poundcake recipe; what better time to share than the holidays!! Add some cellophane and ribbon and you have a nice little gift.

Click on pic for larger view

Monday, December 6, 2010

Glitter Ornaments

Hi blog family... I'm back with another post!!!
Over the weekend, the kids and I made glitter ornaments; the ornaments turned out perfect and they were so easy to make! 
To create the ornaments we used clear glass ornaments (2 5/8), martha stewart fine glitter, doodlebug glitter for a couple of them and pledge w/ future shine  floor wax.
For the finishing touch we added names created in MTC with the Andantino JF font using oracal outdoor vinyl...
Click on pic to enlarge
The kids wanted to thank Tameka and Nett for placing an order!


Blog Candy Winner!!!

Yippy!!!
I have a winner...
Thank you all for taking the time to stop by and show me some blog love...
The ladies and I had such fun on our first ever Christmas and New Year Blog Hop...
"Treva"
Please email me your mailing info so that I can get your candy in the mail!


Saturday, December 4, 2010

Sistas Scrap Too Christmas and Countdown to the New Year Blog Hop!!

Christmas is coming and so is the new year! To get you in the spirit of the season, the divas of Sistas Scrap Too! have come together for a Christmas and Countdown to the New Year blog hop! There are 17 blogs in the hop, so make sure you use the links below this post to hop to all of the participating blogs. If you arrived here from Stampin Dymonz's blog you are on the right track! No worries if you miss one, you can always go back! These 17 divas have a lot in store for you. From exquisite creations to offers of blog candy, you will enjoy hopping your way to all of the blogs involved! Don't forget to leave some blog love for the creators -- they love getting feedback on their designs!

Milk and Cookies for Santa on the Run...We all know that Santa is super busy...
so I created a treat that was dash and go appropriate!!!!
Using an awesome MTC file from Dana and 2 sheets of 12x12 cardstock I was able to create this cute cookie box complete with yummy chocolate chip cookies ( the instructions were crystal clear and the box can be made in minutes)...
I finished it off by adding a simple PNC gift tag!
For the 16oz acrylic tumbler ( the tumblers are super sturdy, even the straw is acrylic and they arrive blank); which I purchased during a share on the Smart Gal MB I used oracal outdoor vinyl  and a adorable penguin file from the MTC gallery to make it more festive ( you can customize these anyway your creative heart desires). Makes a perfect gift for the Santa who's on a run!!
Make sure you leave a comment with contact info for a chance to win some yummy blog candy!

Cookie box and Acrylic Tumbler

Acrylic Tumbler with lid

Cookie box with cut & print tag
 Disclosure- we did not order our tumblers from the company in the link; however, another person on the MB made this recommendation!


DON'T GO YET!!!
I have a couple more projects and some BLOG CANDY to share...
Cyber Crop Project 44 over on the MTC forum was to create a Picture Puzzle... This project was soooo much fun and will turn almost any image from ordinary to WOW!!!
I found both images on the web via google images, using the instructions and MTC file from the attached link I was able to re-create these awesome Picture Puzzles.  The first image was framed in an 8x10 frame and the smaller image in a 5x7 frame.


8x10 Framed Picture Puzzle

5x7 Framed Picture Puzzle and Close-up
 Thank you for participating in the Sistas Scrap Too first ever blog hop! 
Leave a comment and become a follower on my  blog for a chance to win the blog candy; You have until 10:00 am EST on Monday, December 6, 2010 to leave a comment to win the blog candy ( remember to leave contact info). I will choose the winner using Random.org... Now hop on over and visit Renee ; Remember to visit all of the blogs and leave blog love -- you never know where you'll find candy!! If you loose your way, below is a linked list of all the participating blogs:

1. Treva's Craft Corner

2. Stampin' Dymonz Creative Space

3. Nubian Crafter NC

4. My {Life}, My {Blog}

5. Step Into Nita's World

6. Sweet Lil Scrapper

7. P-Kaysunshine Creations

8. Sharing My Stuff

9. Yaya Philly Craft World

10. Cassie's Crop Corner

11. M. M. DeZigns

12. Made By Dee

13. Riley's Custom Creations

14. It's A Family Affair!

15. Cuttin' Up

16. Stamping On The Road

17. In Shelly's World


I didn't forget the BLOG CANDY!!!!


Good Luck!

Saturday, November 13, 2010

PNC with MTC

Told ya I had a couple projects to share... After seeing what the the new beta version of MTC could do I took the plunge and made the purchase... Well the verdict is in and I LOVE it... if you haven't tried MTC head on over to the forum and take a look around; the new beta features include an awesome rhinestone feature, new shape options, textures and PRINT and Cut just to name a few!!!
So far I've only been able to play with the PNC feature which is very similar to  the Cricut Imagine; however, I can use any image, color, or texture that I want... How awesome is that?? Anywho, here are the two images that I have print and cut, not perfect but I'm getting there and I can live with the results:-)
The ice cream cone is a Lettering Delights image and the Bratz Doll is a coloring page that I imported and colored ( the pics are brighter then they appear)

I'm BACK with Stick Figures to share!!

Hi bloggers, once again real life has taken me away from the fun of creating but
 I'M BACK... and I have a couple cute projects to share.
My girlfriend asked me some time ago to make stick figures for her car & I finalllly delivered . Using MTC (my 3rd. cut ever using this awesome software) and outdoor vinyl I was able to create these cute little figures ( the women is approx. 5 inches tall and the little guy is around 3.5) the next time I make these I will go a few inches taller.

Sunday, September 12, 2010

Royal Knights static cling vinyl car decal

Long time no see fellow bloggers:-)... Once again, life has gotten in the way of me having fun; however, I took a few minutes to try out the cling vinyl that I purchased from craftvinyl (btw,super fast service and the products are great). Okay, on to details about the project... my husband and a group of coaches/friends recently started an AAU Youth Basketball Team (Royal Knights) and of course we needed decals... so cricut to the rescue!!! My co-worker who is super kind created two awesome logos for the team to use (thanks Chris)!!!
 After tracing the image in SCAL2 I was easily able to cut the logo using vinyl (cricut vinyl and wallpops). Once cut, I used transfer paper and attached to the static cling vinyl... Super easy and it holds up well...


BTW, the pic was taken with the cling on the outside window for picture purposes ONLY!!! Cling should be applied to the inside of the window...

Thursday, August 12, 2010

Football Magnet Madness!!!

Are you ready for some FOOTBALL????
Football season is finally here and my youngest son couldn't be more excited ( oh, lets not forget the husband)...Jaeden plays for the local Lions Club and DH coaches his team so you know I have to represent... 
Using the Cricut magnet material, chocolate brown vinyl, and a tutorial found over on Everday Cricut,  I  created this super cute... oh excuse me, macho looking football car magnet...                                                        
( I didn't add J's number b/c they haven't been issued uniforms)
Anywho, this was my tester so now that I have the technique down its on and popping!!!


I can see more magnets and football shirts in the near future...
excuse the fuzzy pic, its so humid here that my lense fogged up


Supplies Used:
Cricut Gypsy
Sports Mania- Football
Plantin School Book- Font
Cricut magnet material
Cricut chocolate brown vinyl
Blue wallpop vinyl
Deep cut blade housing

BTW, in order to get the white parts that are shown, I first hide them on my G, and cut only the outline of the football using the deep cut blade, press load mat and replace the blade with the regular blade housing. Hide the football outline and show the white parts, cut with your settings on 3,3,3 ( this will cut the vinyl but not through the magnet). Weed and apply your wording ( I used transfer tape for this step).

Wednesday, August 11, 2010

Goofin' Around Disney!

In April, our family went to Disney World for 7 wonderful days!!!
This was Trin and J's first EVER visit to Disney and they had the time of their lives!!!
The kids got to meet some great characters and of course I was on spot to capture the moment..
I really had fun creating this LO using a sketch from pencillines.com.
I also created and used a hidden journaling tag/ticket (behind Goofy's signature) which is something totally new for me!!!


J and Goofy...


Trin and Goofy
Supplies Used:
Mickey and Friends- Goofy & Spiral on the tag
Plantin School Book- Photomats
Fabulous Finds- Journaling Ticket
SCAL- Circle and Font ( Minnie)
Word- Journaling
Copy of Goofy's Signature from autograph book

Monday, August 2, 2010

Birthday Diva on Board!!!!

On Saturday, my daughter Trinity celebrated her 10th Birthday with an outing to the nail salon and mall with six of her friends (whew what a day, these little ladies have some energy!)...
Oh my, why didn't someone warn me before I agreeded to take on this Birthday wish????
All in all we had a wonderful and eventful day.
In keeping with the Birthday Diva theme, I altered a canvas bag for each girl using HTV and iron on bling... Oh what fun. In addition, I created Trinity her very own Birthday Diva t-shirt once again using HTV, SCAL and the I-Rock
( If you don't have this nifty lil tool, you should go out and get it  ...)

It's the Birthday GIRL!!!
Canvas bags purchased from Michael's
                                      
   Birthday Diva Shirt


Supplies used:

Michaels Canvas Bags
Target T-shirt
Heat Transfer Vinyl
Iron on Bling
I-Rock Bling and tool
SCAL
Edwardian Script Font
Princess Font ( for the nail polish and cell phone)


Please excuse the poor picture quality...
This was a last minute picture.

Monday, June 14, 2010

Dabbling in Photography...

Last week, our dear friend Anthony loaned me his older model Canon DSLR to "try out"....
You see, I have been debating on whether or not I need to upgrade from my point & shot (hmmm...) after very little practice I can say that I LOVE, LOVE, LOVE the DSLR...
I'm still on the basic functions of the camera; however, I can see us becoming fast friends!!!
Here are a few pics that I have taken over the last week.
Each day I learn something new and cannot wait to explore all the functions.
Now, I need to start saving for my upgrade, so PC please stop coming out with new carts!!!!


Son


With my Daddy's Hand- ds getting his hair cut by his daddy...


Flower from the front garden

I have a long way to go but I am having soooo much fun practicing...

Monday, June 7, 2010

A Dream Come True

This week over at Platinum Scraps, the designers were asked to create a LO using this super cute Pencillines sketch

Right away, I had the perfect LO in mind... While on vacation in April, my 5 year old neice stated that we had made all her dreams come true by allowing her to meet Princess Tiana... She was truely overjoyed and speechless (which is no small feat for this little lady)!


Supplies Used:
Bazzil CS
Storybook Cricut Cart
Sweethearts
Plantin School Book
SCAL
Felt Fusion

PS- Prince Frog has not been drinking, he is just loopy in love with Princess Tiana!!!

Sunday, June 6, 2010

Naughty Coupon Book

Yep, you read the title correctly... Every now and then I like to explore my naughty side (okay, just joking but I thought this idea was too cute not to duplicate, thanks LauraH)... So for our 9th. anniversary I decided to throw in this oooh so naughty coupon book as one of my husband's gifts!!!


A couple coupons didn't make the blog b/c they were a bit too racey!!! Oh, the wonderful things you can do with SCAL...

Supplies Used:
Chipboard for front & Back Cover
Gypsy for all the cuts
Cricut carts:
TBBM
Sweethearts
New Arrivals
From My Kitchen
Everyday Paper Dolls
Indie Art
SCAL
Wording was computer generated


Tuesday, May 11, 2010

A gift your guest won't forget...

Told you that I've been creating, just haven't had time to post:-).
Last week over on Platinum Scraps we were asked to create a project for Mother's Day;
but what do you give to the person that has it all??? hmm, give me a minute... I say tile tissue paper coasters, the coasters are super easy to create, yet have that WOW factor that you look for in a gift!!!


who can forget this face, especially when your glass is sitting on it...

Thanks to Shimmy Bean Creations for the awesome tutorial on printing on tissue paper
&
SplitCoast Stampers  for the how-to tutorial.

Supplies Used:
Modge Podge
4x 4 Tumbled Granite tile
Dollar Tree tissue paper
Storybook- scallop circle
Sentiment is computer generated

FYI- I found that if I allow my ink to dry on the tissue paper before using the sealer I got more of the actual picture color... Also, allow extra time for drying.. You will need to let the sealer completly dry before stacking and wrapping with ribbon ( I learned this the hard way)

Sock Cupcakes: So yummy without the guilt!!!

Life has been sooo busy for our family... We recently returned from a wonderful Disney vacation and a quick weekend trip to DC... top that off with multiple family member birthdays, Mother's Day and end of school year testing... whew, I'm exhausted!!! School is about to end and the kids are getting a tab bit antsy... summer sports are starting and my days are running into my nights ( oh, what a life!!!); but I've managed to find some ME time... time to create and just be free ( if only for a few minutes:-). Okay, now to the good stuff... Every year for Mother's Day, we give all the Mother's in our lives a small token of appreciation, this year thanks to Greenbean I created 15 of the cutest sock cupcakes with matching Jr. Legal Pads!!! I think they turned out perfect and everyone loved them!!!


Supplies Used:
Sweet Treats- Cupcake Holder
Plantin Schoolbook- Circle
Storybook- Scallop circle
Stamp Sentiment- Paper Trey Ink
Various ribbon and PP

Tuesday, April 27, 2010

I Hope U Dance...

This week over on PlatinumScraps, we were asked to use the below sketch by Robin to create a one page lay-out...


Using elements from the dress that my daughter wore to the 2010 Father-Daughter dance ... I created a Paris themed lay-out based on the sketch... I hope that you enjoy my interpretation of the sketch!!!


Carts used:
Everyday Paper Dolls- grass
From My Kitchen- cheese wedge
Forever Young- perfume bottle
Gypsy Font- title
Gypsy Wandering- music note
Pooh and Friends- clouds
SCAL- Eiffel Tower, Sacre Coeur, wine bottle and glasses, doves

* I used various cardstock and printed paper

Tuesday, April 20, 2010

Forever Young Clock Canvas

This week over on Platinum Scraps we were asked to use the Forever Young cartridge to create any altered item... I decided to create a clock using stretched canvas and the wonderful ladies from Forever Young!!! This cart was so much fun to work with and offers a ton of possiblites...

Monday, March 22, 2010

Wonderful World of Disney!!!

Three weeks and counting... the kids are so excited about our upcoming Disney vacation, and I will admit that I'm having tons of fun creating Disney related items for them to enjoy!!!
This week over on platinumscraps the designers were asked to create any altered item, so to keep the Disney mood going I altered a couple plain t-shirts that were purchased from AC Moore using Siser EasyWeed Heat Transfer Vinyl and the Mickey and Friends Cricut cart...

Click on pic for larger view

Sunday, March 14, 2010

Sea World T-shirts

Whew, its been a minute since I've posted to the blog... Our schedule has gotten quite busy with all of the kids activities and work; however, we are less than one month away from our Disney/Sea World vacation so I need to get cracking!!!
To help save on cost and add a little personalization to our trip, I decided to make custom Sea World t-shirts... I created the logos using SCAL from images found on brandsoftheworld.com and freelogovector.net.
Click on pic for a larger view ( the shirts are actually brighter in person)

Saturday, February 20, 2010

2010 Father-Daughter Dance

Last night my daughters and husband attended the 2010 Father-Daughter Dance at Trinity's school...
They all looked great (if I do say so myself) and they had a wonderful time. Trinity and Ciara even managed to get my husband to dance!!!
Trinity said the dance was the most fun she has ever had!!!
 Be on the look-out for LO's featuring the dance pictures...


Music Player


Get a playlist! Standalone player Get Ringtones